
How to import classroom rosters
Goal
Add a whole class roster at once by uploading a CSV — best for full rosters from your registrar.
Two ways to do this
As the class's teacher — no admin rights needed. Go to Classroom → Taught by Me → [your class] → Enrollments → Add Student → Invite via CSV.
As a Workspace Owner or Admin — manage any class's roster, not just your own, from Workspace Settings → Classes → [class] → Enrollments → Add Enrollment → Invite via CSV.
Quick path
Open the class's Enrollments (via either path above).
Click Add Student (or Add Enrollment) → Invite via CSV, upload your file, and confirm.
Step-by-step
Open the class's Enrollments. As the teacher: Classroom → Taught by Me, open your class, click Enrollments. As an Admin/Owner: Workspace Settings → Classes, click the Enrollments count for the class.
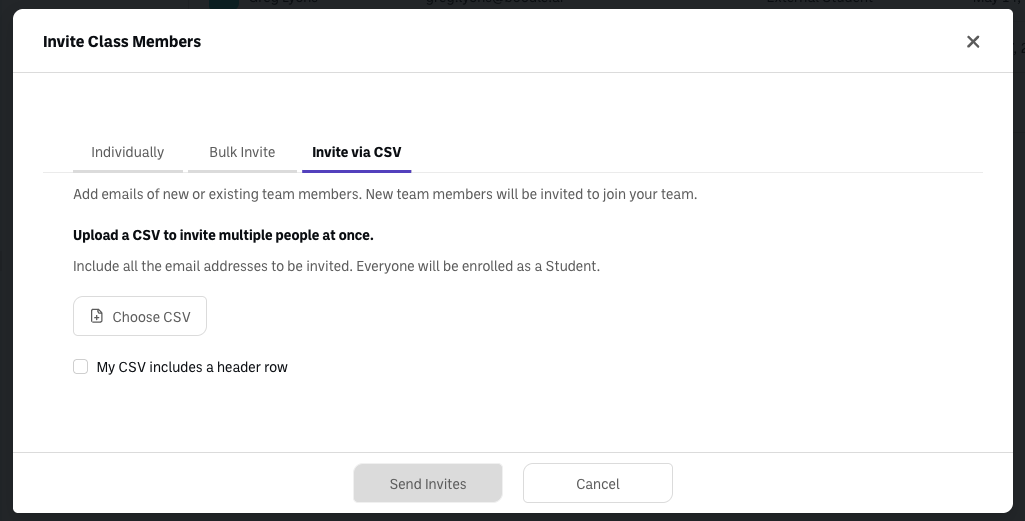
Click Add Student, then choose the Invite via CSV tab.
Prepare your CSV with two columns:
Column 1 — every email address to invite.
Column 2 (optional) — the role: Teacher, Assistant, or Student. Blanks default to Student. Anyone not already in your workspace is enrolled as an External Student regardless of the role column.
Select File, upload it, and tick Exclude column headers if your file's first row is a header. Then Send Invites — everyone in the file is invited at once.
Good to know
Your workspace Admin can turn off teacher-managed enrollment in Workspace Settings → Access Control → Allow teacher-managed class enrollment — if you're a teacher and don't see this option on your class, ask your admin.
Verify it's working
The people from your file appear in the class's Enrollments list with the role you assigned, and your assignments show up for them under Assigned to Me.
Still stuck?
For team-wide (not class-specific) bulk adds, see How to add or remove a whole group at once with a CSV. Reach out through our contact form and we'll get back to you.